
Learning how to refinish wood furniture can breathe new life into tired, worn pieces while saving you hundreds of dollars. Whether you’ve inherited grandma’s dining table or found a diamond in the rough at a thrift store, refinishing transforms forgotten furniture into stunning centerpieces.
This comprehensive guide walks you through every step of the refinishing process. You’ll discover professional techniques that deliver salon-quality results right in your garage or workshop.
Quick Reference Summary
| Aspect | Details |
|---|---|
| Time Required | 3-7 days (including drying time) |
| Skill Level | Beginner to Intermediate |
| Average Cost | $30-100 per piece |
| Tools Needed | Sandpaper, brushes, stain, finish |
| Success Rate | 95% with proper preparation |
| Recommended Wood Types | Hardwoods (oak, maple, cherry) |
Why Refinish Instead of Replace?
Refinishing wood furniture makes both financial and environmental sense. A quality hardwood piece can last generations with proper care. Meanwhile, new furniture often uses particleboard or veneer that won’t withstand years of use.
Consider the numbers: A new solid wood dining table costs $800-2000. Refinishing that same piece typically runs $50-150. That’s savings of 80-90% while preserving craftsmanship you simply can’t find today.
Environmental Impact
Every refinished piece keeps furniture out of landfills. Americans throw away 12 million tons of furniture annually. By refinishing, you’re part of the solution.
Essential Tools and Materials
Must-Have Tools
- Orbital sander or sanding blocks
- Various grits of sandpaper (80, 120, 220)
- Tack cloth or microfiber rags
- Natural bristle brushes
- Foam brushes for smooth finishes
- Drop cloths
- Rubber gloves
- Safety glasses
- Dust mask
Materials You’ll Need
- Wood stripper (if needed)
- Wood stain or paint
- Clear protective finish
- Wood filler
- Fine steel wool
- Mineral spirits
Pro Tip: Quality brushes make an enormous difference. Cheap brushes leave streak marks and bristles in your finish.
Step 1: Assessment and Preparation
Before diving into refinishing, evaluate your piece carefully. Some furniture isn’t worth the effort, while others hide beautiful wood beneath layers of paint.
What to Look For
- Solid construction (no wobbling)
- Quality joinery
- Interesting wood grain
- Sturdy hardware
Avoid pieces with extensive water damage, cracked structural elements, or veneer that’s lifting significantly.
Setting Up Your Workspace
Choose a well-ventilated area away from living spaces. Garages work perfectly, but ensure temperatures stay between 65-75°F. Stain and finish don’t cure properly in extreme temperatures.
Lay drop cloths generously. Wood stain stains everything it touches, including concrete floors.
Step 2: Stripping Old Finish
Many pieces need complete stripping before refinishing. Paint and thick varnish hide wood’s natural beauty.
Chemical Strippers
Modern gel strippers work effectively with less mess than traditional liquid versions. Apply with an old brush, wait 15-30 minutes, then scrape with a plastic putty knife.
Safety First: Work outdoors when possible. Chemical strippers contain harsh solvents that require proper ventilation.
Heat Stripping
Heat guns soften old finishes quickly. Keep the gun moving to avoid scorching wood. This method works especially well on paint.
User Review Spotlight
“I was terrified to tackle my grandmother’s china cabinet, but following this process gave me confidence. The gel stripper made removal so much easier than I expected. My cabinet looks better than new!” – Sarah M., Home Renovator (★★★★★)
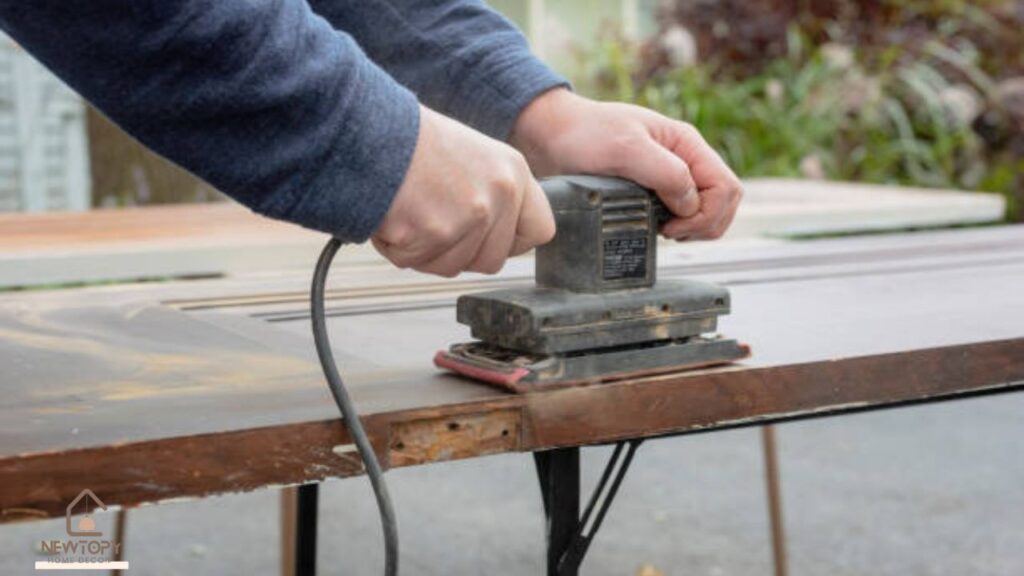
Step 3: Sanding – The Foundation of Great Finishes
Proper sanding separates amateur from professional results. Most people skip grits or sand inconsistently.
Progressive Sanding System
- Coarse grit (80-100): Removes remaining finish and major imperfections
- Medium grit (120-150): Smooths out scratch marks from coarse sanding
- Fine grit (220): Creates perfect surface for stain adhesion
Sand with the grain, never against it. Cross-grain scratches show through stain dramatically.
Power vs. Hand Sanding
Orbital sanders speed the process but require practice. They can create swirl marks if used incorrectly. Hand sanding gives more control but takes significantly longer.
Time-Saving Tip: Use power sanders for flat surfaces, hand sand curves and details.
treeleftbigshops offers premium picks for every taste—shop with ease and save big.
Step 4: Wood Preparation and Repair
Now your piece reveals its true condition. Address any damage before moving forward.
Filling Holes and Dents
Wood filler comes in various colors. Choose one slightly lighter than your intended finish – stain darkens filler differently than raw wood.
Apply filler with a putty knife, overfilling slightly. Sand flush once completely dry.
Dealing with Dents
Steam can raise minor dents without filler. Place a damp cloth over the dent and press with a hot iron for 10-15 seconds. The steam swells wood fibers back into place.
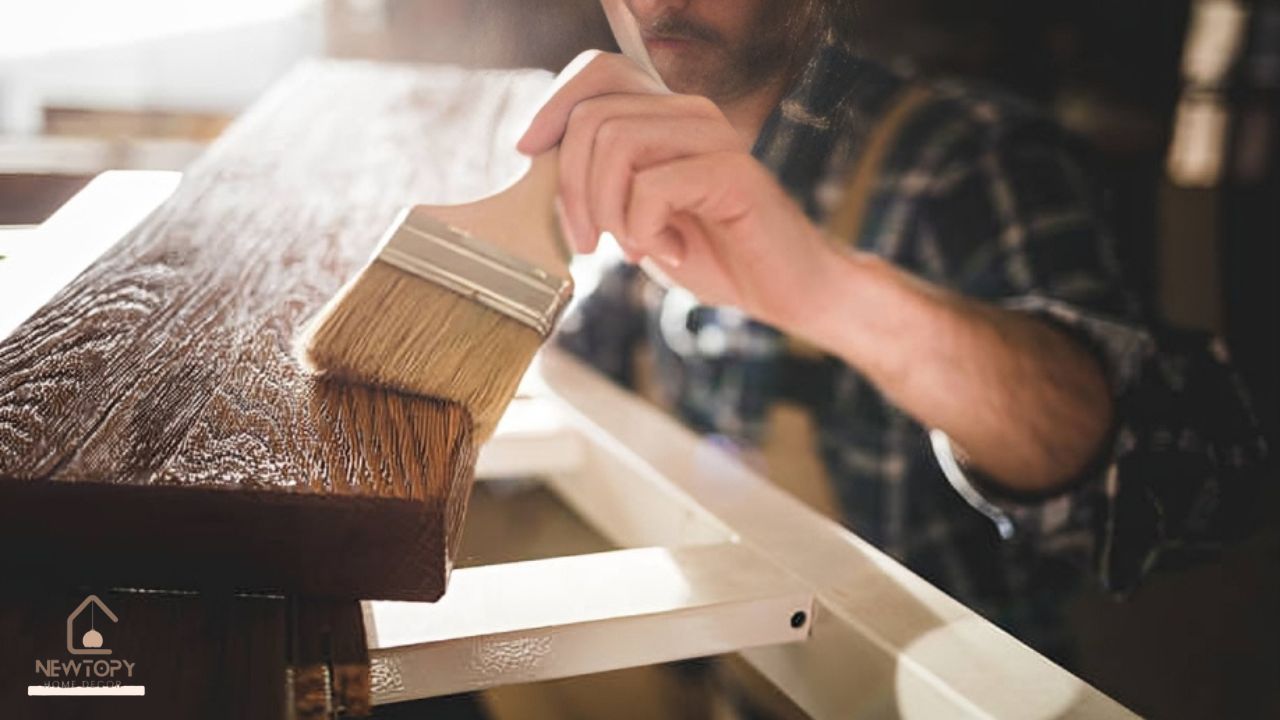
Step 5: Staining Your Masterpiece
Staining transforms ordinary wood into stunning furniture. However, stain application requires technique and patience.
Choosing the Right Stain
Test stains on hidden areas first. Wood species accept stain differently. Pine gets blotchy, while oak stains beautifully and evenly.
Application Technique
- Stir stain thoroughly (don’t shake – creates bubbles)
- Apply with the grain using foam brushes or rags
- Work in manageable sections
- Wipe excess stain within 5-15 minutes
- Allow proper drying time between coats
Critical Point: Consistency is key. Maintain wet edges to avoid lap marks.
Popular Stain Colors
- Dark Walnut: Rich, sophisticated look
- Golden Oak: Warm, traditional appearance
- Ebony: Modern, dramatic statement
- Natural: Enhances wood without color change
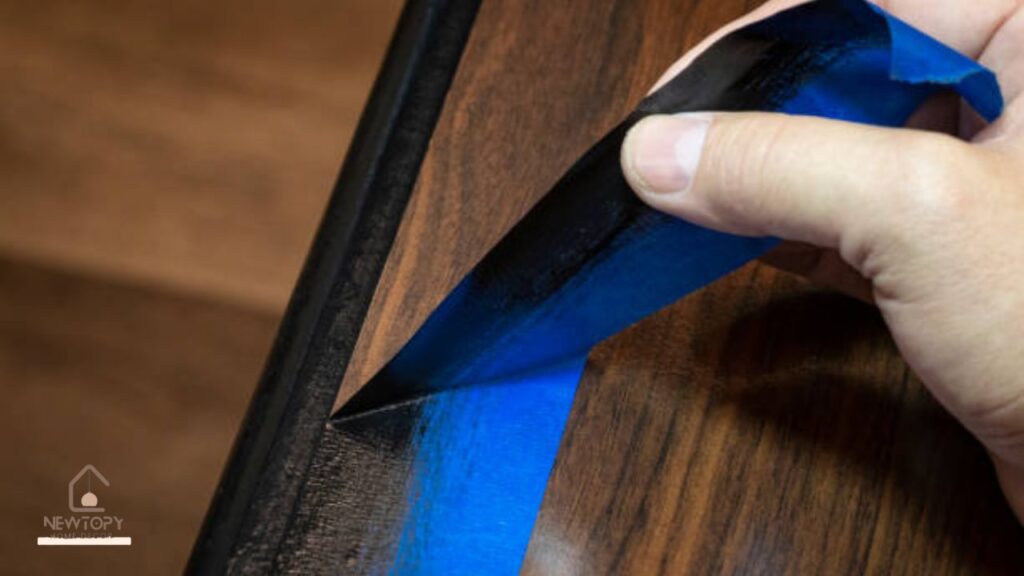
Step 6: Applying Protective Finish
The finish protects your hard work while enhancing wood’s natural beauty.
Finish Options Compared
| Finish Type | Durability | Appearance | Maintenance |
|---|---|---|---|
| Polyurethane | Excellent | Plastic-like | Low |
| Lacquer | Good | Natural | Moderate |
| Shellac | Fair | Warm glow | High |
| Oil | Fair | Natural | High |
Application Tips
- Use natural bristle brushes for oil-based finishes
- Apply thin, even coats
- Sand lightly between coats with 320-grit paper
- Remove all dust with tack cloth
Most projects need 3-4 coats for adequate protection.
User Experience
“The polyurethane finish on my kitchen table has held up to daily use for three years. Still looks like the day I finished it!” – Mike T., DIY Enthusiast (★★★★★)
Advanced Techniques for Professional Results
Grain Enhancement
Raise the grain before final sanding. Dampen the wood lightly with distilled water. Once dry, sand with 220-grit paper. This technique prevents grain raising after stain application.
Color Matching
Mixing custom stain colors lets you match existing pieces perfectly. Start with a light base and add darker colors gradually. Test frequently on scrap wood.
Troubleshooting Common Problems
Blotchy Stain
Usually caused by uneven sanding or wood species that accept stain irregularly. Pre-stain conditioners help with problem woods like pine and maple.
Brush Marks in Finish
Caused by working finish too long or using wrong brush type. Sand out marks and reapply with proper technique.
Cloudy Finish
Often results from moisture trapped in finish or temperature issues during application. Strip and start over if severe.
Connecting Nature and Luxury Interiors

When considering how to refinish wood furniture, think about the origins of your materials. The trees, shrubs and vines that provide our wood create connections between nature and home design. High-end locations featured on luxuryinteriors.org, chalet luxe alpes le collectionist, or location villa ibiza le collectionist often showcase beautifully refinished antiques alongside house plants in Dutch style arrangements.
This combination of restored furniture and living greenery creates sophisticated, welcoming spaces that celebrate both craftsmanship and nature.
Cost Analysis: DIY vs. Professional
DIY Costs
- Sandpaper: $15-25
- Stain: $12-20
- Finish: $20-30
- Brushes/supplies: $15-25
- Total: $62-100
Professional Costs
- Labor: $150-300
- Materials: $50-75
- Total: $200-375
DIY saves 50-70% while providing immense satisfaction.
Maintenance After Refinishing
Proper care extends your refinished piece’s life dramatically.
Daily Care
- Use coasters and placemats
- Clean spills immediately
- Dust with microfiber cloth weekly
Annual Maintenance
- Apply paste wax for extra protection
- Check for wear in high-use areas
- Touch up small scratches promptly
Health and Safety Considerations
Wood refinishing involves chemicals requiring proper precautions.
Essential Safety Gear
- Respirator mask (not just dust mask)
- Chemical-resistant gloves
- Safety glasses
- Long sleeves and pants
Ventilation Requirements
Always work with adequate air circulation. Open doors and windows, use fans to move air. Chemical vapors concentrate quickly in enclosed spaces.
Frequently Asked Questions
Q: How long does the entire refinishing process take?
A: Plan for 5-7 days including drying time. Actual working time is 8-12 hours spread across multiple days.
Q: Can I refinish furniture indoors?
A: Only water-based products should be used indoors. Oil-based stains and finishes require outdoor application or garage with open doors.
Q: What’s the biggest mistake beginners make?
A: Rushing the process. Each step needs proper time to cure. Shortcuts always show in the final result.
Q: How do I know if my piece is worth refinishing?
A: Quality hardwood construction with good joinery almost always justifies refinishing. Avoid particleboard or extensively damaged pieces.
Q: Can I change wood color dramatically?
A: Yes, but going lighter requires bleaching first. Dark to light transformations are challenging and often require professional help.
Q: Should I strip all old finish?
A: Not always. Light scuff sanding and restaining works if existing finish is sound. Complete stripping is necessary for paint or damaged finishes.
Q: How do I dispose of chemical waste properly?
A: Never pour chemicals down drains. Contact local hazardous waste disposal facilities for proper disposal methods.
Q: What’s the shelf life of stains and finishes?
A: Unopened containers last 3-5 years when stored properly. Once opened, use within 1-2 years for best results.
Conclusion: Transform Your Space with Confidence
Learning how to refinish wood furniture opens a world of possibilities. Every piece you restore saves money while creating something uniquely yours. The skills transfer to other projects, building confidence with each success.
Start with a simple piece like a side table or bookshelf. Master the basics before tackling complex furniture with intricate details.
Remember, perfection isn’t the goal initially. Each project teaches valuable lessons that improve your technique. Soon you’ll spot potential treasures others overlook, transforming discarded furniture into family heirlooms.
The satisfaction of completing a refinishing project rivals any store-bought piece. You’ve invested time, care, and creativity into something that will serve your family for decades. That’s the true magic of furniture refinishing – creating beauty while preserving history for future generations.
Admin Recommended
Garden Tips for Decoradhouse: Transform Your Outdoor Space
Garden Tips for Decoradhouse: Transform Your Outdoor Space
Discover the Elegance of Luxury Villas in Italy with Le Collectionist
KDArchitects Landscape Ideas by Roger Morph